Wiko View 2 Orange Enable USB Debugging
by Editorial Staff
If you are the owner of the Wiko View 2 Orange and you want to know; how to enable USB debugging on your Wiko View 2 Orange. Here we will guide you how to enable USB debugging mode on your View 2 Orange. using Developer Options, you can easily customize animations, background processes, USB cable settings, etc.
Quick Steps to enable USB debugging Mode in your Wiko View 2 Orange
Step 01: First of all, go to Settings your Wiko View 2 Orange
Step 02: Now, you will see Settings option >>>> select About phone then choose >>>> Software Information.
Step 03: Now, Scroll down your screen and find the Build Number your Wiko View 2 Orange, now tap the Build number 7 to 10 times until you will see a pop-up message that says "Developer mode has been enabled".
Download latest Wiko firmware flash file [stock ROM]
Step 04: After 10 minutes, you will see a popup message "you are now a developer" on your Wiko View 2 Orange
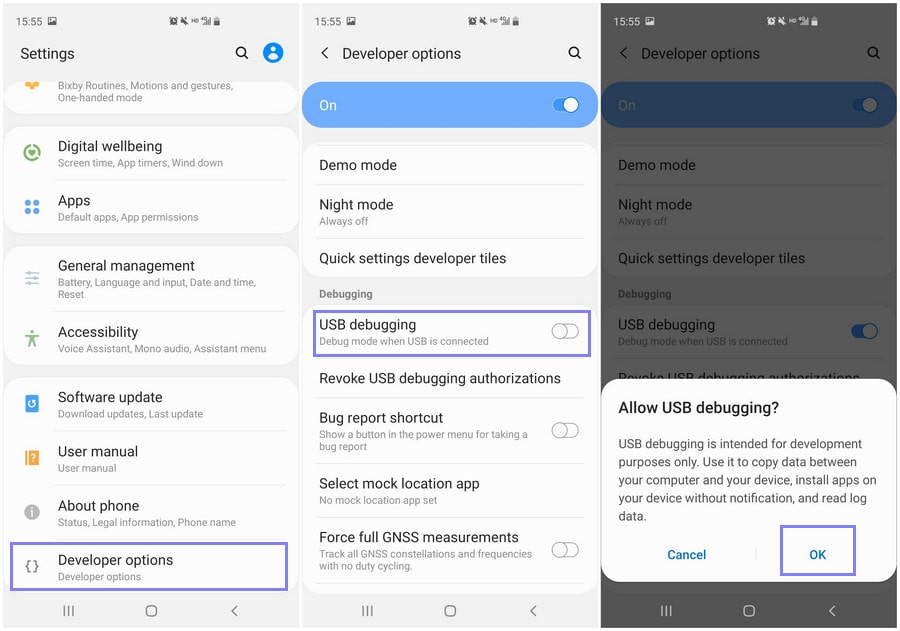
Step 05: Now, you will see the Developer options menu under Settings via Tap on the Back button.
Step 06: Then, You will click on Developer options. Slide the "Developer Options" button to "On".
Step 07: Then scroll down your phone screen and turn on "USB debugging". You will see the messages "Allow USB Debugging", click the "OK".
Now, you have successfully enabled USB debugging mode on Wiko View 2 Orange.
Read Me Once We are not responsible for any damage to your Wiko View 2 Orange while doing anything with USB Debugging. You must create a backup of all files and save them in a safe location.